The sweater project continues. When spinning, my default yarn seems to be a two-ply with a gauge from fingering weight to sport weight. However, I want to follow the sweater pattern as written and not do a lot of calculations. Since the pattern calls for a gauge of 4 1/2 stitches per inch on size 7 to 8 needles (which is more like a worsted weight - thicker than fingering and sport weights), I'll need to change my default ways to spin a different weight of yarn.
Now, there are a lot of ways to spin yarn. Some of the basic ways are spinning it woolen or worsted, but then you can also ply it. Will it be a two ply, three ply, four ply? Or maybe not ply it at all and leave it a singles?
Also, what ratio will the yarn be spun with? I have three whorls for my wheel and they each have two different ratios, together they range from five twists per inch all the way up to 20 twists per inch.
After a lot of experimenting, spinning up different small samples and knitting gauge swatches, I decided upon a single ply, spun worsted at a ratio of five twists per inch. At the gauge I need, this seemed to give me the softness and amount of drape I wanted in the knitted samples.
And so the spinning commenced, and as of today, all two pounds of the dyed, superwash BFL has been spun into eight skeins of worsted weight singles yarn. I'm hoping the gauge is consistent enough throughout all of the skeins so that the knitting proceeds without hiccups. Fingers crossed! As I've said before, this is all a learning process.
Next step; begin knitting!
Pages
▼
Saturday, June 30, 2012
Thursday, June 28, 2012
The sweater project: step one, dyeing the wool
I have finally begun a project which I have been looking forward to for some months. I found a really cute sweater pattern in this book (which I found in my library), and have been itching to make it for my daughter. The other day everything was in place: 2 lbs. superwash Bluefaced Leicester wool roving, check; dyes, check; daughter, check; time, check. So we began.
First phase: Dyeing the wool.
We set up the tables outside and got the dyes ready. We are using weak acid dyes, which are set with vinegar and heat. The heat can be supplied in many ways, but we used the oven and the microwave. Here is our setup (click on any of the pictures to see them larger):
I left the mixing of the colors to my daughter so that she could get the colors she wants for the sweater:
Here is the first batch of wool getting its color. This batch is all one color, so it was dyed all together in an aluminum roaster:
Ready for the oven! This batch will go into the oven at 400 degrees F for about 40 minutes:
What a gorgeous color!
Now, on to the next batch, four 4-ounce lengths of roving which need to be handpainted in mutliple colors:
My daughter had lots of help:
Some of which took breaks in the shade or sun, according to species:
A length of colors:
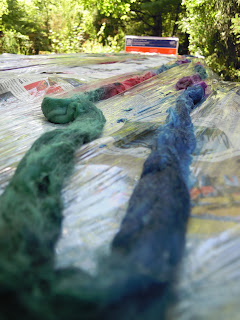
Ready for the microwave! The roving is encased in cellophane, rolled up, and microwaved for about 4 minutes to set the colors:
Here is the dyed roving, after heating and setting the color, laid out to dry in the sun:
And here is the dried roving, it's so soft!:
Next phase: Spinning the wool into yarn.
I will have to spin it all a consistent gauge, hopefully at 4.5 stitches per inch on size 7 or 8 needles (US). That's the tricky part. Wish me luck!
Here is a picture from the Yarnplay book of the sweater we are aiming for (but ours will be in my daughter's colors).
My knitting skills are only so-so. I'm hoping that I'm up to the task, but I've been wanting to delve into this project for a very long time and I'm excited about it. It's all a learning process!
Wednesday, June 20, 2012
Hanging herbs to dry
I have lavender, lemon balm, yarrow, hyssop, and calendula hanging to dry now on my drying rack. The first batch of many, I hope!
Friday, June 15, 2012
This is where cranberries come from!
At a recent trip to Triangle Bog in Kent, Ohio, I snapped a picture of a cranberry blossom. They're pretty small (click on the picture to see a larger version). If you want to see a picture of cranberries in the same bog, click here.
Thursday, June 14, 2012
Dyeing with red cabbage
I decided to try dyeing with red cabbage. It's one of those dyes that may not be particularly light-fast, and different colors can be achieved by raising or lowering the pH of the dyebath. I'm a little leery of those types of dyes, but I was curious to see if I could get nice blue out of the process, so I proceeded.
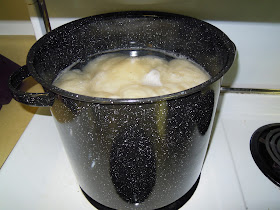
I bought a nice, red cabbage from the grocery store, cut it up and put it in a pot with water to make the dyebath (click on any of the pictures to see them bigger):
While the cabbage was simmering away, I mordanted the fiber, which consisted of 4 ounces of superwash BFL wool, and about 4 ounces of white, handspun, baby alpaca yarn. The mordant I used was alum and cream of tartar:
Here is a picture of the cabbage starting to give its color to the dyebath:
When the dyebath was ready, I strained the cabbage leaves out and separated the liquid into two pots. One pot I left with its nice, blue color, and the other pot I added vinegar to until it was a pink-purple color. I put the alpaca yarn in the blue pot, and the roving in the pink-purple pot.
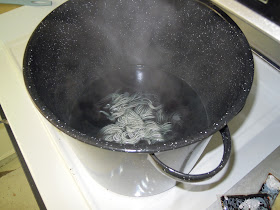
Here is the handspun baby alpaca singles yarn in the dyebath:
And here is the superwash BFL roving in the dyebath:
After dyeing for about an hour, I covered the pots and took them off of the heat. I let them sit overnight, and in the morning, both pots had changed to a green color. Here is the color that I got on both the roving and the yarn - the yarn is in rinse water after being taken out of the pot:
And here are the results after drying and spinning - the alpaca is the green, center-pull ball, and the superwash BFL is the green skein. This picture was taken with a flash, but the following picture is without a flash:
The other yarns in the picture have also been dyed with natural dyes, pokeberry, marigold and cleavers root (from left to right), with the soft greens from the red cabbage. Again, this picture is without a flash:
I actually really like the green that I got from the red cabbage, but I'm not sure how light-fast it will be. It may fade to gray over time, which will be sad.


